
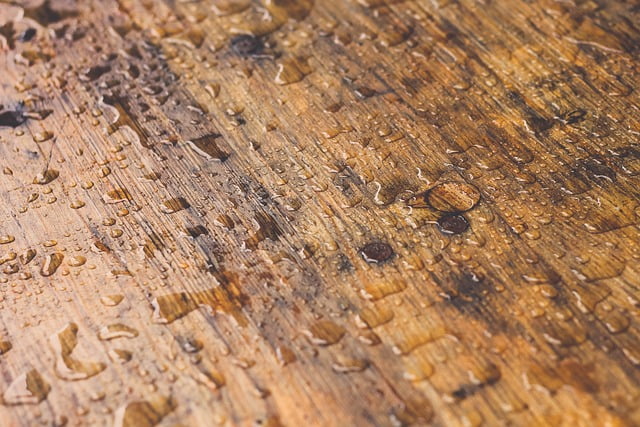
No, you cannot paint wet wood effectively; the moisture prevents proper adhesion and drying. Painting wood requires it to be dry to ensure the paint bonds correctly and lasts longer.
Preparing to paint wood entails ensuring the surface is completely dry. Painting on wet wood can lead to a host of problems, such as peeling, blistering, and mildew growth, which compromise the durability and aesthetic of your paint job. For a long-lasting finish, the moisture content in the wood should generally be below 15%.
To check if wood is dry enough, use a moisture meter or simply wait for it to fully dry after rain or dew. Patience is crucial in painting projects; taking the time to start with a properly prepped, moisture-free surface can save you from future headaches. Choosing the right conditions for painting outdoors is likewise critical—always opt for a dry, warm day.
The Science Behind Painting Wet Wood
Attempting to paint wood without considering its moisture level can lead to a plethora of problems. Understanding the science behind painting wet wood is crucial for achieving a long-lasting finish. Wood is a hygroscopic material, meaning it naturally absorbs and releases moisture from the air. When it comes to painting, the magic happens when the paint forms a solid, adherent layer over the wood’s surface. However, moisture can interfere with this process, causing a slew of difficulties. Let’s dive into how moisture affects paint adhesion and how to measure wood moisture content to ensure a successful painting project.
Effects of moisture on paint adhesion
Effects Of Moisture On Paint Adhesion
Moisture in wood can significantly undermine paint adhesion, causing the paint to not stick properly or to peel off prematurely. When paint is applied to a damp surface, it doesn’t form a strong bond. Here’s what happens:
- Blisters and Bubbles – Moisture trying to escape from wood can cause the paint to lift, forming unsightly blisters or bubbles.
- Peeling and Flaking – Over time, the compromised adhesion can lead to peeling or flaking of the paint layer.
- Mold and Mildew Growth – Trapped moisture can create an environment that’s conducive to the growth of mold and mildew.
Ensuring the wood is adequately dry before starting your painting project is essential for a durable finish.
Understanding Wood Moisture Content
Measuring the moisture content of wood before painting is a preventative step that cannot be overlooked. Wood’s moisture content is expressed as a percentage, comparing the amount of water in the wood to the wood’s dry weight.
| Moisture Content (%) | Suitability for Painting |
|---|---|
| 5-9% | Ideal for painting |
| 10-15% | Proceed with caution |
| >15% | Not recommended |
For accurate readings, a moisture meter can be used. It’s an invaluable tool for painters and DIY enthusiasts alike. Simply placing the device on the wood surface can reveal its moisture level. Aim for a moisture content that is within the ideal range before you begin painting to ensure optimal adhesion and finish quality.
Do’s & Don’t Of Painting Wet Wood
Painting wood is a surefire way to enhance its protection and aesthetic appeal, but moisture content matters. Wet wood is tricky; it requires specific techniques for a lasting finish. Below, explore the do’s and don’ts of painting wet wood, ensuring a job well done.
Do’s:
Preparing the Wood Surface
Proper preparation is key to painting success. Begin by drying the wood as much as possible. If complete drying isn’t feasible, at least ensure the surface isn’t saturated. Use a cloth to wipe off any visible water. If timing allows, set the wood aside to air-dry.
- Sand the surface lightly to remove debris and create a texture that the paint can adhere to better.
- Clean the surface to get rid of dust, oils, and other contaminants.
- Apply primer if necessary, especially for wood surfaces that will be exposed to harsh conditions.
Choosing the Right Type of Paint
Not all paints are suitable for wet wood. Select water-resistant options such as oil-based or latex-based exterior paints which can handle some level of moisture.
| Paint Type | Properties |
|---|---|
| Oil-Based | Durable and less affected by wood moisture |
| Latex-Based | Flexible and capable of adapting to wood expansion |
Don’ts:
Risks of Painting Wet Wood
Painting wet wood may lead to numerous problems such as paint bubbling, peeling, and poor adhesion. Moisture trapped beneath the paint layer can encourage mold growth and wood decay, severely shortening the lifespan of both the paint and the wood itself.
Avoiding Common Mistakes
Rushing the drying process is a mistake. Using heat guns or intense direct heat can cause wood to warp or crack. It’s also vital to avoid painting in high humidity or rain, even if the wood appears to be surface-dry. Always check the weather forecast before beginning your painting project.
- Do not skip surface prep; it ensures paint longevity.
- Do not apply thick coats of paint; aim for thin, even layers.
- Do not use interior paints; they lack the necessary durability for wet conditions.
Effective Techniques For Painting Wet Wood
Embarking on a new paint project can often be halted by the unpredictable element of moisture. Whether you’re dealing with a recent downpour or lumber that hasn’t fully dried, painting wet wood requires a specific skill set and tools to ensure a successful outcome. Grasping effective techniques for painting wet wood can save time, and resources, and provide a long-lasting finish. Here, we explore tried and true methods to help you achieve the best results, even under less-than-ideal conditions.
Using Moisture-resistant Primers
When preparing to paint wet wood, one cannot emphasize enough the value of a quality moisture-resistant primer. This foundation layer is crucial for creating a barrier that locks out moisture and prepares the surface for the topcoat. Look for primers that specify their suitability for damp conditions or are designed for exterior use where contact with moisture is a given.
- Examine the wood for excess moisture, and if possible, allow it to air dry to the point of being just damp.
- Apply a thin layer of moisture-resistant primer, ensuring complete coverage.
- Allow the primer to cure for the recommended time before moving on to the paint application.
Applying Paint In Humid Conditions
Painting in areas with high humidity presents its own set of challenges. Selecting the right kind of paint is a pivotal step. Opt for paints that are specifically formulated to withstand high humidity and have excellent adherence properties on wetter surfaces. Oil-based paints typically fare better than their latex counterparts in these conditions due to their water-repellent characteristics.
| Step | Action | Tip |
|---|---|---|
| 1 | Check the weather forecast | Avoid rainy or overly humid days if possible. |
| 2 | Apply thin coats | Thicker layers struggle to dry properly in humidity. |
| 3 | Extend drying times | Humid air means slower drying, so be patient. |
Best Practices For Drying Times
Proper drying between coats of primer and paint is non-negotiable, and even more so with wet wood. Rushing the process only leads to potential peeling, bubbling, and other imperfections. Commit to the manufacturer’s recommended drying times, and if unsure, err on the side of caution with extended periods. Fan-assisted drying can be beneficial in this context, helping to speed up the evaporation of moisture from painted surfaces. Nonetheless, this should complement, not replace, natural drying times.
- Check the paint’s technical specifications for appropriate drying times.
- Ensure good ventilation in the workspace to promote airflow.
- Consider dehumidifiers to assist in removing excess moisture from the air.
- Touch-test the wood before adding a subsequent coat to ensure it’s fully dry.
Ensuring Longevity: Sealing Painted Wet Wood
When it comes to protecting woodwork, particularly pieces that have been painted while the wood was still wet, sealing is critical. The technique of sealing painted wet wood is a preventive measure that safeguards the integrity of the wood and the beauty of the paint. It’s a step that should not be overlooked if you desire long-lasting results. Let us explore how sealants can benefit this type of wood and the proper way to apply and maintain them, ensuring your wood remains in pristine condition for years to come.
Benefits Of Using Sealants On Wet Wood
Sealants offer numerous advantages when applied to wet wood that’s been painted:
- Moisture Protection: Sealants provide a barrier that prevents further water absorption, crucial for wet wood that’s susceptible to moisture.
- Enhanced Durability: By blocking the elements, sealants help extend the life of the wood and maintain the paint’s finish.
- Mold and Mildew Resistance: A quality sealant can help to prevent the growth of mold and mildew, common problems in damp wood.
- UV Resistance: Many sealants include UV inhibitors that protect the wood and paint from the sun’s damaging rays.
- Improved Aesthetics: Sealants can give painted wood a polished look by adding a glossy or matte finish based on the product used.
Proper Application And Maintenance
To ensure that sealants provide maximum benefits, correct application, and regular maintenance are essential:
- Surface Preparation: Before applying sealant, ensure the wood is clean, dry to the touch, and free from contaminants.
- Choosing the Right Sealant: Select a sealant designed for use on wet wood and compatible with the type of paint used.
- Application Technique: Apply sealant according to the manufacturer’s instructions, typically using a brush, roller, or sprayer.
- Drying Time: Allow ample time for the sealant to dry completely before exposing the wood to moisture or touch.
| Timeframe | Maintenance Action |
|---|---|
| 6 Months | Inspect sealant integrity and look for any cracks or peeling. |
| 1-2 Years | Clean the surface and reapply the sealant if necessary. |
| 3-5 Years | Comprehensive check and potential complete reseal. |
By regularly checking the sealant’s condition and performing maintenance as needed, you can greatly prolong the life of your painted wet wood, keeping it as vibrant and sturdy as the day it was finished.
Frequently Asked Questions For Can You Paint Wet Wood
What Happens If You Paint Over Wet Wood?
Painting over wet wood can lead to poor adhesion, causing the paint to peel or blister. Moisture trapped beneath the paint layer may also cause wood rot and mold growth.
How Dry Should Wood Be Before Painting?
Wood should be dry with a moisture content of 15% or less before painting. Use a moisture meter to check levels for best results.
Can You Paint Wood That Was Rained On?
Yes, you can paint wood that was rained on, but ensure it is completely dry before painting to prevent peeling and mold issues.
Can You Paint Wet Treated Wood?
No, you should not paint wet-treated wood. Wait until the wood fully dries, which can take several months. Painting before it’s dry can lead to poor adhesion and potential decay. Always check the wood’s moisture level before starting your painting project.
Conclusion
Painting wet wood is not recommended for optimal results. Ensure the wood is dry before starting your project. This attention to preparatory detail leads to a lasting, high-quality finish. It’s best to wait for the right conditions—your patience will pay off.
Remember, dry wood equals a successful paint job.
