
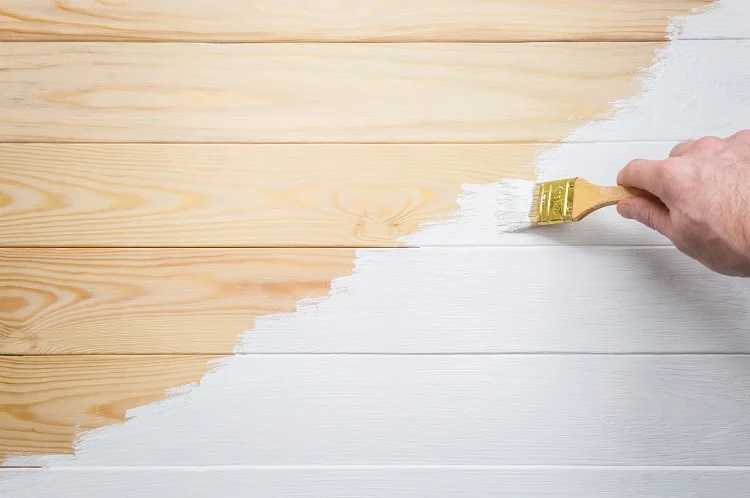
To paint cedar wood, start by cleaning and priming the surface. Then apply a high-quality, exterior-grade paint using a brush or sprayer.
Preparing cedar wood for painting requires attention to detail and the right materials to ensure the best finish. Cedar, known for its natural beauty and durability, is a popular choice for outdoor furniture, siding, and decks. Before painting, it’s essential to thoroughly clean the wood to remove any dirt, debris, or old finishes that could prevent paint adhesion.
Sanding the surface smoothens it and helps the primer adhere better. Choosing a high-quality primer is crucial; it should be designed for exterior use and compatible with cedar to avoid chemical reactions that can spoil the wood. Once the wood is primed, selecting an outdoor paint suitable for cedar will offer protection from the elements, enhancing the wood’s longevity. Adhering to these steps will result in a professional-looking finish that showcases the wood’s natural charm beneath a protective layer.
Cleaning And Sanding Cedar Wood
Before embarking on the exciting journey of painting cedar wood, it is critical to focus on the foundational steps of cleaning and sanding. This preparatory phase is crucial for achieving a flawless finish that not only enhances the natural beauty of cedar wood but also ensures the longevity of your paint job. Let’s delve into the methods and practices needed to adequately prepare cedar wood for a spectacular transformation.
Remove Dirt And Debris
Cedar wood surfaces can accumulate a significant amount of dirt and debris over time, which can impede the paint’s ability to adhere properly. Start with a thorough cleaning process to ensure that the wood is free from any foreign particles. Use a soft bristle brush to gently scrub the surface with a mixture of mild dish soap and water. Rinse with clean water and allow the wood to dry completely before proceeding to the next step.
- Inspect the wood carefully for any signs of mold or mildew, which may need a specialized cleaning solution.
- Any remaining residue can be removed with a damp cloth.
- It is important to protect nearby vegetation if using any chemical cleaners.
Sand The Surface For Smoothness
After cleaning, sanding the surface is essential for both smoothing any imperfections and creating a surface that allows the paint to adhere better. Use fine-grit sandpaper, ideally between 150-200 grit, to gently sand the cedar wood in the direction of the grain. This will help avoid any unwanted scratches or damage to the surface of the wood.
- Begin with a coarser grit if there are larger imperfections and gradually move to finer grit sandpaper.
- After sanding, wipe the surface with a tack cloth to remove all sawdust and particles.
- Ensure even coverage across the surface, paying close attention to corners and edges.
By meticulously cleaning and sanding cedar wood, you pave the way for a seamless painting process. These preparations result in a surface that not only accepts the paint well but also helps extend the life of your paintwork, showcasing the true beauty of cedar.
Applying Primer On Cedar Wood
Before diving into the vibrant world of color, applying primer on cedar wood is a critical step not to be overlooked. The unique properties of cedar, such as its natural oils and porous surface, demand careful preparation to ensure a flawless finish. Primer serves as the foundational coat that seals the cedar, enhances the paint’s adhesion, and extends the life of your paint job. Let’s explore how to select the right primer and techniques for applying it that result in better adhesion and a stunning final appearance.
Choosing The Right Primer
Identifying the right primer is paramount for cedar wood projects. A high-quality, oil-based primer is often recommended due to its compatibility with the wood’s natural oils. It creates a barrier that prevents tannin bleed-through, ensuring the paint retains its intended color without discoloration.
- Opt for primers specifically labeled for exterior wood surfaces.
- Select primers that are micro-porous, allowing the cedar to breathe while still blocking moisture.
- Ensure the primer is labeled as tannin-stain resistant to safeguard against the cedar’s natural tannins.
Don’t forget to check the manufacturer’s recommendations and the compatibility with the topcoat paint. The harmony between primer and paint is crucial for a long-lasting, beautiful finish.
Application Techniques For Better Adhesion
The technique is vital in the primer application. Proper application ensures that the primer coats the cedar evenly and bonds securely. Follow these tips for superior adhesion:
- Clean the surface before priming. Remove any dust, dirt, mold, or mildew, as these can hinder adhesion.
- Sanding the wood lightly creates a rougher surface for better primer grip.
- Apply the primer with a high-quality brush, roller, or sprayer. Brushes reach the crevices in rough cedar, while rollers and sprayers offer a more uniform coat.
- Apply thin coats rather than one heavy layer. This avoids drips and ensures faster drying – crucial for a secure bond.
- Allow proper drying time before applying additional coats or the finishing paint.
A successful primer application sets the stage for painting. Taking the time to apply it correctly enhances the paint’s durability and gives the cedar wood a professional, polished look that lasts.
Selecting High-quality Exterior Paint
When setting out to enhance the natural beauty and protect the longevity of cedar wood, selecting the right exterior paint is a critical step. It’s not just about finding a shade that complements your home; it’s also about choosing a formula that promises endurance against the elements. High-quality paint serves as armor against weathering, UV rays, and wear while ensuring that the warmth of cedar shines through season after season.
Researching Paint Options
Beginning with a thorough research phase is vital to paint cedar wood effectively. Look for paints specifically designed for use on wood exteriors. These products often contain additives that protect the wood from fungi and pests while preserving its flexibility. A good starting point is to compile a list of paints with high ratings and positive reviews from other cedar homeowners and professionals.
Evaluating Durability And Weather Resistance
When choosing an exterior paint, the hallmarks of quality are durability and weather resistance. A superior paint will resist peeling, cracking, and fading over time. Manufacturers often provide guaranteed lifespans for their products – these can be a reliable indicator of durability. Make sure to compare these guarantees against your local climate conditions:
- Ultraviolet (UV) resistance for areas with high sun exposure
- Moisture resistance for humid or rainy climates
- Flexibility in fluctuating temperatures to prevent cracking
Selecting a paint that caters to the specific demands of your environment will ensure that your cedar remains vibrant and well-protected.
Brush Vs. Spray Painting
When it comes to giving cedar wood a vibrant life and protection against the elements, choosing the right painting method is crucial. Homeowners and DIY enthusiasts often find themselves deciding between brush painting and spray painting. The decision affects the finishing quality, the time taken for the project, and even the longevity of the paint job. Let’s dive in and compare the pros and cons of each method and how to pick the right one for your project.
Pros And Cons Of Each Method
| Method | Pros | Cons |
|---|---|---|
| Brush Painting |
|
|
| Spray Painting |
|
|
Choosing The Suitable Technique For Your Project
The ideal technique for your cedar wood painting project depends on various factors. Brush painting works excellently for detailed trim work or smaller areas where precision is key. It’s also cost-effective since it minimizes waste and allows for a handcrafted touch. On the other hand, spray painting shines when dealing with vast surfaces like fences or sidings, where uniformity and quick completion of the project are paramount.
Assess the size of your project, the level of detail required, and how much time you can dedicate to the task. Larger, less intricate projects often lend themselves to spraying, while a brush is your go-to for more meticulous work. Always ensure you have the right equipment and safety measures in place, especially when spray painting, as it can get messy and require good ventilation.
Applying Multiple Coats
When embarking on the intricate task of painting cedar wood, patience is paramount. The technique of Applying Multiple Coats is not just a recommendation but a cornerstone for achieving durability and a polished look. Let’s dive into the essentials of coat application and understand why meticulousness at this stage is non-negotiable for your cedar masterpiece.
Importance Of Multiple Coats
Painting cedar wood is a delicate balance between art and technique, where multiple coats stand as the barrier against wear and elements. Multiple layers of paint build a shield that retains the color and integrity of the wood.
- Protection: Each layer seals the cedar, guarding against moisture and UV rays.
- Longevity: Additional coats translate to the extended life of the paint job.
- Aesthetics: Successive layers help in achieving an even, streak-free finish.
Comprehensive coverage is crucial, particularly for outdoor cedar surfaces that battle constant exposure. A single coat might leave you with a patchy outcome prone to early degradation.
Proper Application For A Smooth Finish
Smooth finishes require more than steady hands; they demand a methodical approach to coat application. To ensure your cedar does not fall victim to the troubles of an uneven paint job, follow these steps:
- Sand: Begin with a fine sandpaper to smooth out the surface.
- Clean: Remove all sawdust and debris.
- Prime: Use a high-quality primer suited for cedar.
- First Coat: Apply the initial layer of paint thinly and evenly.
- Drying: Allow ample drying time as recommended by the paint manufacturer.
- Subsequent Coats: Add 1-2 more coats, each layer after the previous one has thoroughly dried. This gap is imperative for preventing tackiness and peeling.
- Inspection: Check for any missed spots or potential drips and correct them as needed.
Tips: Utilize a paintbrush or roller appropriate for the type of paint and the texture of the cedar. Always work in a well-ventilated area and wear protective gear. Aim for a consistent stroke direction and maintain a wet edge to avoid lap marks.
Sealants For Longevity
Protecting cedar wood from the elements is crucial for its longevity, and sealants play a pivotal role in this. Cedar, known for its natural beauty and durability, nonetheless requires a layer of defense against moisture, UV rays, and other environmental aggressors. Applying a high-quality sealant can significantly extend the life of cedar wood, maintaining its aesthetic appeal and structural integrity for years to come. Here, we will delve into the advantages of using sealants and guide the application and reapplication processes.
Benefits Of Using Sealants
A sealant offers a multitude of benefits when used on cedar wood:
- Moisture Protection: A robust barrier that keeps out water, reducing the risk of rot and decay.
- UV Resistance: Minimizes the fading and discoloration caused by the sun’s harsh rays.
- Enhanced Durability: Protects against scratches, dents, and everyday wear and tear.
- Mold and Mildew Resistance: Prevents the growth of unsightly and potentially harmful fungi.
- Aesthetic Preservation: Helps maintain the natural beauty of cedar, keeping the wood looking fresh and vibrant.
Application And Reapplication Processes
Proper application and regular maintenance of sealant are key to maximizing the protective benefits:
- Surface Preparation: Ensure the cedar wood is clean, dry, and free from previous finishes for optimal adhesion.
- Type Selection: Choose the right type of sealant, such as acrylic-based or oil-based, suitable for cedar wood.
- Test Area: Always apply the sealant to a small, inconspicuous area first to confirm compatibility and finish.
- Even Application: Use brushes, rollers, or sprayers to apply a consistent coat, following the wood’s grain for best results.
- Drying Time: Allow for adequate drying time as per the manufacturer’s instructions before a second coat or usage.
- Reapplication Frequency: Regularly inspect the wood and reapply the sealant every 2-3 years or more frequently in harsh climates.
By adhering to these steps, cedar wood installations remain durable and beautiful through changing seasons and usage demands.
Regular Maintenance Tips
Ensuring your painted cedar wood remains vibrant and well-protected over time involves routine maintenance. Proper upkeep not only extends the life of the paint but also helps maintain the structural integrity of the wood. Let’s dive into the essential practices for keeping your painted cedar surfaces in tip-top shape.
Cleaning and touch-up procedures
Cleaning And Touch-up Procedures
Maintaining the aesthetic appeal of cedar wood requires regular cleaning and timely touch-ups. Here’s how to keep your paintwork looking pristine:
- Gentle Cleaning: Every six months, clean the wood surface with a mixture of mild soap and water to remove dirt and mildew. Rinse thoroughly with a gentle hose spray, avoiding high-pressure washers that may damage the wood.
- Scratch and Chip Repair: Inspect for scratches and chips in the paint. Use matching paint to touch up any blemishes. Sand the area lightly before applying thin coats for a seamless finish.
Tip: Avoid harsh chemicals for cleaning, as they can strip the paint and damage the cedar.
Inspection for potential damage
Inspection For Potential Damage
Consistent inspection can prevent minor issues from ballooning into costly repairs. Here’s a checklist to guide your inspection:
| Inspection Area | What to Look For | Action Needed |
|---|---|---|
| Siding and Trim | Peeling, cracking, or flaking paint | Scrape off loose paint, sand, and apply a new coat |
| Joints and Seams | Signs of moisture or gaps | Caulk to seal gaps and prevent water intrusion |
| Overall Structure | Rot, mold, or wood damage | Replace or treat affected sections promptly |
Routinely conducting a detailed inspection helps detect early signs of damage, ensuring the longevity and beauty of your cedar wood remains preserved.
Frequently Asked Questions On How To Paint Cedar Wood
Do You Need To Prime Cedar Wood Before Painting?
Yes, priming cedar wood before painting is essential to ensure proper adhesion and to prevent tannin bleed-through.
Is It Better To Paint Or Stain Cedar Wood?
Staining cedar wood is often preferred over overpainting, as stain enhances the natural beauty and grain. Paint, while more protective, can obscure cedar’s unique characteristics and may require more maintenance.
How Do You Paint Interior Cedar Wood?
Begin by sanding the cedar wood to smooth the surface. Clean off any dust, then apply a primer designed for wood. Once dry, use acrylic or latex paint, applying with smooth, even strokes. Finish with a sealant to protect the paint job.
How Many Coats Of Paint On Cedar?
Typically, cedar requires two coats of paint for optimal coverage and protection. Always allow the first coat to dry completely before applying the second.
Conclusion
Painting cedar wood can enhance and protect it, ensuring longevity and beauty. Remember the key steps: proper cleaning, priming, and choosing the right paint. Regular maintenance will keep your cedar surfaces vibrant for years to come. Embrace these tips for successful cedar wood painting projects.
Happy painting!
